Saturday, March 29, 2014

Easter Egg Boxes

 
Pretty Little Easter Egg Boxes
Perfect for Filling with Jelly Beans

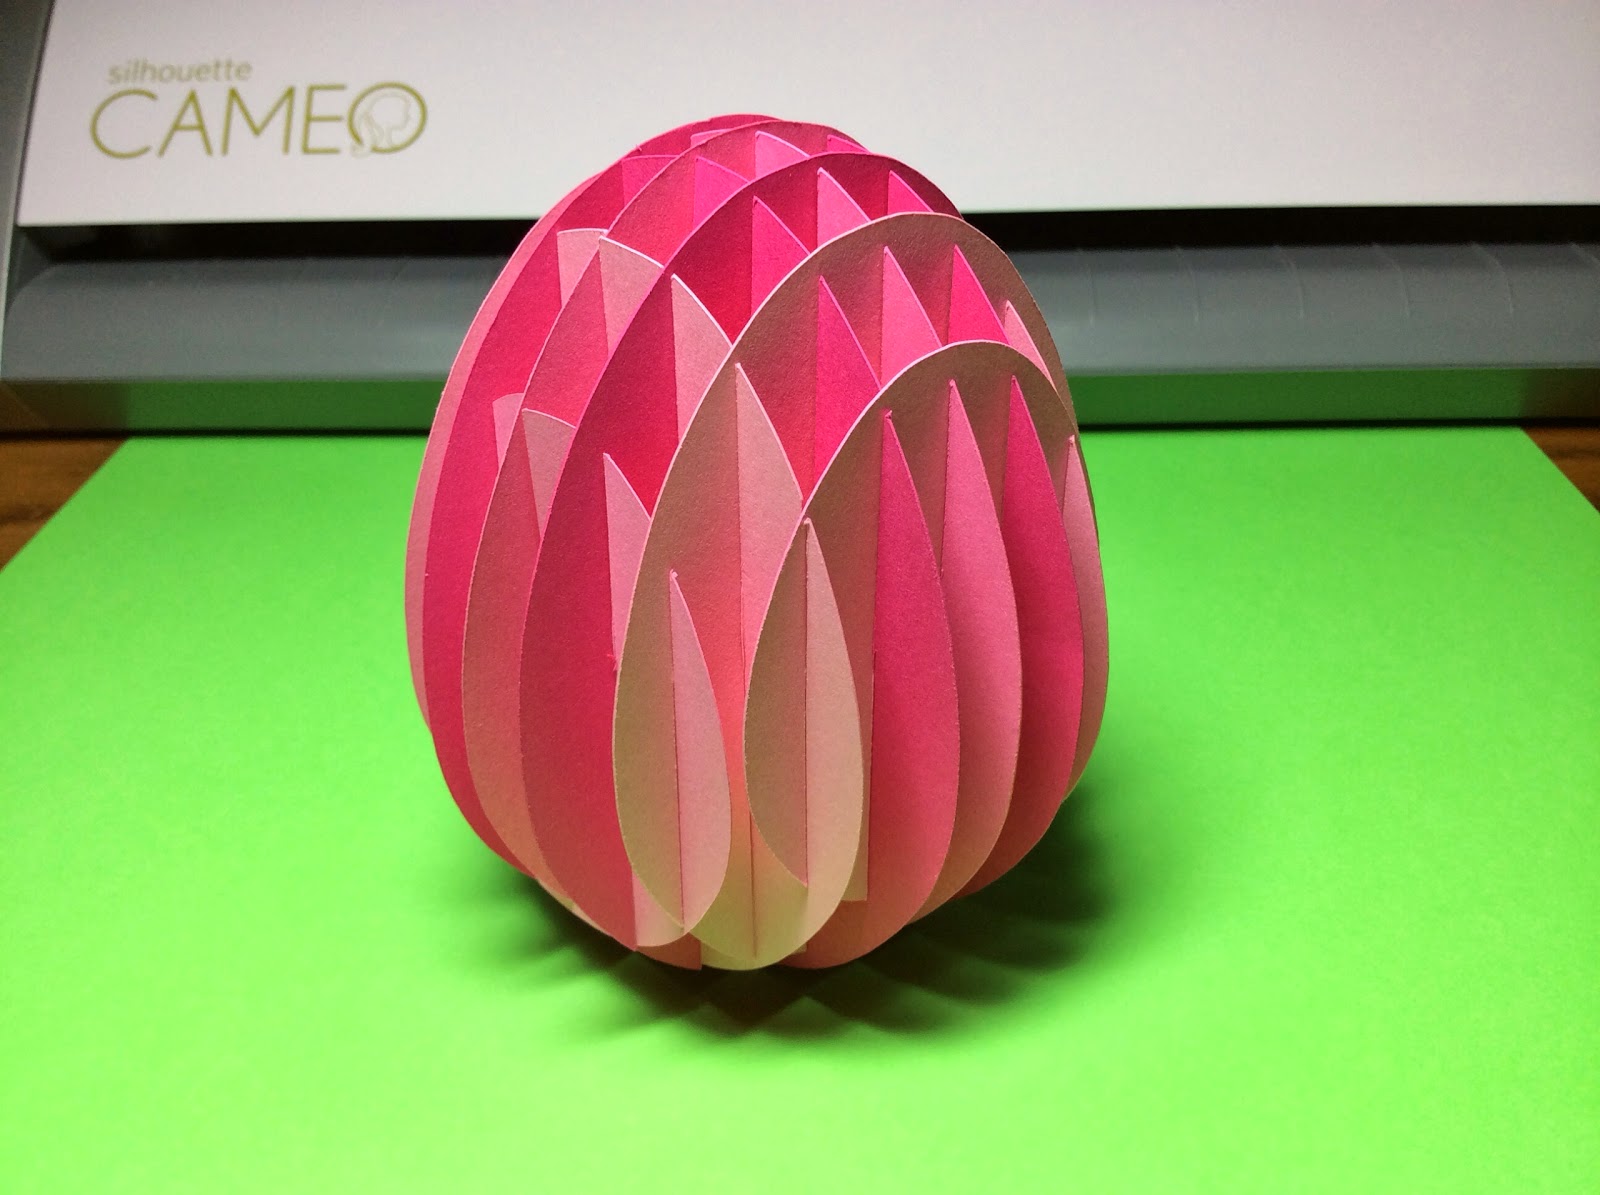
I wanted to make an egg-shaped box for Easter.  I thought about recreating the shape of an egg...an oval shape with one end wider than the other.  However, it is not practical.  The user of the box would become frustrated when the cover of the box would not match up with the base and they would have to fidget with the cover to close it.  The oval shape works the best...no frustration factor and its the closest look to a real egg-shape.

Here is the PDF.
https://drive.google.com/file/d/0B7oGIyVDbRGYMzBrdGkzZ1NtVlk/view?usp=sharing&resourcekey=0-n0jUBgBnia-SUpcNcFCv_w

Here is the .Studio file.  I used cardstock.
https://drive.google.com/file/d/0B7oGIyVDbRGYYlJ5Z3NUQ2N3TEk/view?usp=sharing&resourcekey=0-kAGnofBy0cr_J0f-wreD0Q

Here are the directions to make this box. The only difference is the shape and I recommend putting the seam on the side of the box since it may distort the oval shape.
http://papercraftetc.blogspot.com/2014/02/a-little-trinket-box-to-hold-your.html

The color scheme directions noted in the PDF and .Studio file are for the Girl Bunny with Kite as seen below.

Girl Bunny with a Kite.  The kite string is crochet thread.
Side view
Baby Chick with a 3-D beak
Zig-Zag Egg
Easter Bunny with a Cottontail and a Basket.  I used a white pompom for its tail. I made the basket 3-D by adding a ridge around the bottom to accommodate all of the eggs.  I used the egg cut-outs from the lid design.
 Polka Dot Egg
 
Side view of all boxes


Saturday, March 22, 2014

Standing a Sliceform Egg on End for the Equinox

Spring is officially here and I made a sliceform egg to celebrate its arrival.


This sliceform egg can stand on its end without any assistance.

The tilt of the earth's axis determines our seasons. When the sun is at its furthest angle away, we have winter with its shorter daylight hours.  When the sun is at its closest angle, we have summer with its longer daylight hours. When the tilt is the same, the daylight and night hours are equal in length.  It is called an equinox.  This equinox occurs twice a year on March 20 and September 22. These dates signify the start of spring and fall. There is a belief that on these dates that you can stand an egg on end because of the alignment of the gravitational pull.  This equality in gravitational pull is supposed to help balance any object. Sadly, this is a fallacy. You can stand an egg on end at any time of the year. Oh well, it's an interesting concept to ponder anyway.

This sliceform egg can also lie flat for mailing.
Here is the PDF of the sliceform egg.


Here is the .Studio file.  I used cardstock.
 

Happy Spring!

An Origami Square Card with a Diamond Shaped Center.

One of my student's came to me with a brochure that he had received from Choate Academy and he challenged me to recreate the folds of the brochure. I looked at it and it was simply a large square which was divided into smaller squares.  He did not give me the brochure so this is how I remember it.  It is a little difficult to fold but I think with a little perseverance I believe you will be able to fold this origami square card.

Origami Square Card
Here is the PDF.
https://drive.google.com/file/d/0B7oGIyVDbRGYYjQtQjczb3RkazQ/view?usp=sharing&resourcekey=0-xgJ9-Ld6iXnXjUX3Cw-QVw

Here is the .Studio file.  I used cardstock.
https://drive.google.com/file/d/0B7oGIyVDbRGYa1otRWpYdDhuX2c/view?usp=sharing&resourcekey=0-hVPCSgn8SyEAmOevHFqDYg

Valley fold the innermost square and the lines which makes the innermost square a diamond as shown in the photo.
Mountain fold the length of the rectangle.

Be patient in folding this model.  Do it slowly and do not make any other unnecessary creases.  It will fold together by itself with a little assistance. Put the center square on the table and gently pinch the corners of the center squares together.  Your left hand is pinching one side of the rectangle forward and your right hand is pinching the other rectangle backward.  Push the rectangles inward and your model will be formed.
Side View
Underneath View

This origami card reminds me of an origami fortune teller.  You can put different words on each of the flaps. This is what Choate did in using this design as an advertisement for their school.


Monday, March 17, 2014

A Leprechaun Carousel Box for St. Patrick's Day

A Leprechaun Carousel Box (Notice the snow in the background.  We had 10 inches of snow!)
 
Happy St. Patrick's Day.  What a day...it's my 12th snow day this school year. I think I have had enough of winter and I am ready for spring.  I modified my carousel from a previous post to reflect today's holiday.  I think the leprechaun is adorable with the pot of gold in his hand.  When the carousel spins, he is going around in circles...exactly what you would expect of a little magic elf.
 
Here is the PDF.
https://drive.google.com/file/d/0B7oGIyVDbRGYaTVtQVNXaWdDckk/view?usp=sharing&resourcekey=0-Hh8oXTiHT01yKAq-NHuleQ

Here is the .Studio file. I used cardstock.
https://drive.google.com/file/d/0B7oGIyVDbRGYOVJlQlR6RnRSVjg/view?usp=sharing&resourcekey=0-LRmY_39V_Tp1iFo9A5B7HA

Use the directions from a previous post to assemble this carousel.
http://papercraftetc.blogspot.com/2014/02/a-carousel-box-that-really-spins.html
 

I added beads to the top of the carousel instead of a flag.  The beads are strung together on a pin and glued to the axle of the carousel.
 
 
Everyone is Irish on St. Paddy's day. Enjoy the day!


A Shamrock Trinket Box for St. Patrick's Day

Shamrock Trinket Box
 
Today is St. Patrick's day.  I decided to make this pretty little trinket box to hold some chocolate treasure.  
 
Here is the PDF.
 
Here is the .Studio file.  I used cardstock.
 
The directions to make this box are similar to a previous post.
 
 
Happy St. Patrick's Day!


Thursday, March 6, 2014

Dreaming of Spring Flowers - An Amaryllis Torus

I am tired of winter with all of the snow that we had this season and I want spring to begin. I am dreaming of warm weather with beautiful flowers. Here is a beautiful flower of my dreams...an amaryllis torus flower.  I love the way that this torus swirls around in the center.  From afar, I think that this paper amaryllis fools the eye and looks real.

Amaryllis Torus Flower

Here is the PDF of the amaryllis torus.
https://drive.google.com/file/d/0B7oGIyVDbRGYejI1UEplZGNXR0U/view?usp=sharing&resourcekey=0-zbD9c69AKd_F1Ov5NDPTJw

Here is the .Studio file.  I used cardstock.
https://drive.google.com/file/d/0B7oGIyVDbRGYMzduTV9fdHMxa2c/view?usp=sharing&resourcekey=0-8Uv_h2qn_n3Pw6aYTFpgVg

Use the directions from the honeycomb pumpkin to make the amaryllis torus flower  http://papercraftetc.blogspot.com/2013/10/a-honeycomb-pumpkin-decoration-for-fall.html

 Flower is completed. Ready to make the stem.
 Make the Stamen and the Filaments
 Glue a contrasting colored stamen and fold the filament in half as shown.

 
 Glue the filament to the bottom of the circle as shown.
 Completed Filaments

 
 Apply glue to the back of the flower.
 Insert the Filaments to the center and make sure that the glue adheres evenly across the back of the flower.
 Here is what the back of the flower looks like after it has been glued.
 Cut the end of a straw into four sections as shown in the above picture.  Staple to the sepal (zigzag edged circle without the whole in the middle)
 Apply glue as shown and add the sepal (the zigzag circle with the whole in the middle) to the center of the straw.  I used two straws for the stem.  I pushed one straw into the other to make one long stem.
 Both sepals are in place on the straw.
 Curl the long strips of paper so that it will be easy to apply around the straw.


 Glue the strip around the straw.  Curl the leaves as shown.
 Glue the two sets of leaves.
 Attach the leaves with glue and wrap another strip of paper around the stem.


 Here is what the leaves look like when attached.
 Use a lot of glue to attach the flower head to the stem. 
 Do not move the flower until the glue is fully dry.  I inserted a wooden skewer into the middle of the straw to give the stem some strength.  Otherwise, the weight of the flower will bend the straw.
Dreaming of Spring...Enjoy the Amaryllis!