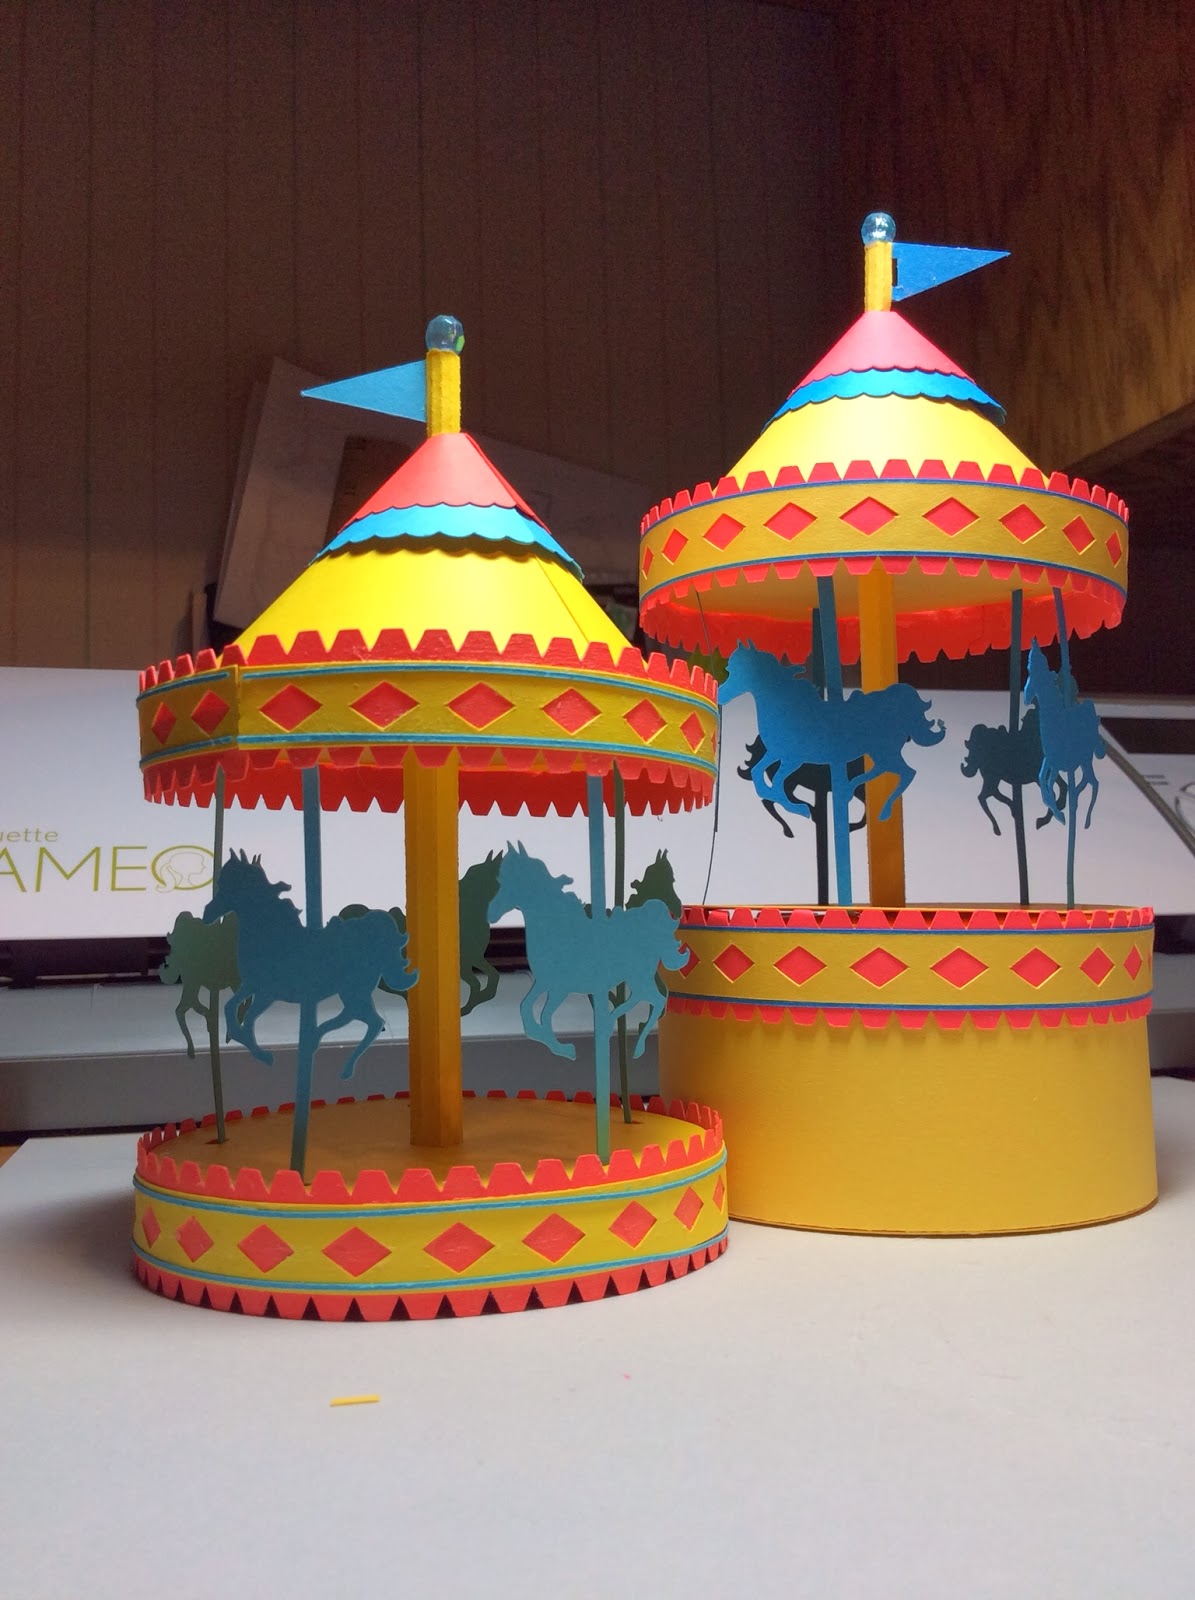
Two versions of the carousel. The one on the left does not have the box base.
I love carousels. I remember as a child going on carousel rides in Asbury Park, NJ in the summer. I wanted to recreate these memories in making this design. This carousel really spins because there is an axle built into the center of the carousel. It took about 30 minutes to cut this design with my Cameo Silhouette machine and about 60 minutes to put it together. I think the effort is well worth it.
Here is the PDF. The directions are for the yellow, blue and red design carousel.
https://drive.google.com/file/d/0B7oGIyVDbRGYZjFsa3ZLYTJvbDA/view?usp=sharing&resourcekey=0-wOdDLeLoniW7y_SuEJ7QSg
Here is the .Studio file. I used cardstock.
https://drive.google.com/file/d/0B7oGIyVDbRGYNGRQYTJVZksyc3c/view?usp=sharing&resourcekey=0-y5az-6FY6gY_3hLJxDDUmQ

Apply glue to the cones as shown.

Adhere the cones together to make the top of the carousel. Align the seams of each section of the cone.

Top of Carousel

Glue the diamond strips to the border as shown.

Slide the small strips of paper over a glue stick.

Form into a circle and glue. This will be for the top of the carousel.

Bend the tabs upward.

Glue as shown

Bend into a circle and glue together.

Completed design. Notice there is a ledge. This is where the circle will be held in place.

Add the circle.

This is what it looks like when you turn it over. I did not use any glue at this point.

Using a glue stick, glue the second circle and place it in the center of the lid.

Placing the circle in the center of the lid.

Completed lid.

Bend the tabs and put glue as shown on the box.

Form the box as shown. Apply glue from a glue stick to one on the circles.

Add the unglued circle to the center of the box.

Turn the box over and add the glued circle to the bottom of the box.

Completed box.

Glue the horses as shown. There is a tab on each horse for placement.

Make the short tube. Glue into a tube as shown.

Glue it to the center of the carousel.

Attach the top of the carousel.

Glue the horses and the tube to make one complete unit.

Glue the flag and long tube together. This is the center axle which allows the carousel to spin.

This axle goes through the center of the cone.

The axle goes through the center of the short tube.

It comes out through the bottom of the carousel assembly where the horses are. DO NOT GLUE the axle here.

Add the round piece of paper shown on the left to the center axle.

NOW...Glue the axle to this piece of paper. This will allow the axle to move freely and spin.

Here it is glued.

Carousel assembly almost completed.

Add glue to the center of the ring design.

Slip the circle around the cone. Notice where you place the seams before allowing the glue to dry.

Notice where the glue is...this is should be even all around.


Glue the bottom of the carousel to the box base.

Completed carousel.

Carousels are lovely especially when they spin!
I have updated this design and explain how it was constructed. https://papercraftetc.blogspot.com/2020/06/a-stem-project-carousel-that-really.html
👏 wow
ReplyDeletethis design can turn an automata toy with a simple gear mechanism.
ReplyDeletewowowowowowowowoowowowowowowowoowowowowowow
ReplyDelete