Wednesday, January 22, 2014

A Valentine Pop-up Card for Someone You Love

A Valentine Pop-up.  
This will fold flat for mailing.

 
 My Valentine pop-up looks pretty in the snow.  I used iridescent white paper and it blends in well with the 5 inches of snow and 7 degree temperatures...second day of no school...more time for crafts!

This is my first attempt at making a real pop-up card.  I didn't use a program...just brute force.  I would love to have the new Pop-up computer program from Make the Cut (it is on my wish list...maybe for my birthday) but I don't think I could have made this design with it because there are there are too many pieces that slide together.

I love the birds sitting on the branch and the heart symbol above with the I and U.  It is supposed to represent "I love you" or "I heart you".  My husband did not see it...he thought it was just scroll work until I pointed it out. This design is similar to my previous design but I removed one of the slices.  When the heart lays flat, the heart symbol is prominent in the center.

Here is the PDF of this pop-up card.
https://drive.google.com/file/d/0B7oGIyVDbRGYQkJHRWNncVpuSkE/view?usp=sharing&resourcekey=0-TmaR-IQ8OgMZd7RMig4Fcw

Here is the .Studio file.
https://drive.google.com/file/d/0B7oGIyVDbRGYSE83SVJ3YXhOcHc/view?usp=sharing&resourcekey=0-hBdsOVVzp8_nPn_k5PWw7A

Here is the SVG.  The file extends outside of the viewable area. Zoom out to see the entire file.
https://drive.google.com/file/d/1HC4uiEsU6FdrscFuUCQTCssxOIK6sbpV/view?usp=sharing

 I recommend using a good quality cardstock as the slits are very tight.  I find that some cardstock does not work as well as others.  It is strange...sometimes certain colors in the same stack of cardstock are better than others.  I buy my cardstock at Target and Michaels in case you were wondering.

Follow the directions to make the sliceform heart from a previous post.
http://papercraftetc.blogspot.com/2014/01/a-paper-sliceform-heart-table-decoration.html
Make the sliceform base using these directions from a previous post.
http://papercraftetc.blogspot.com/2013/12/paper-snow-globe-sliceform-for.html


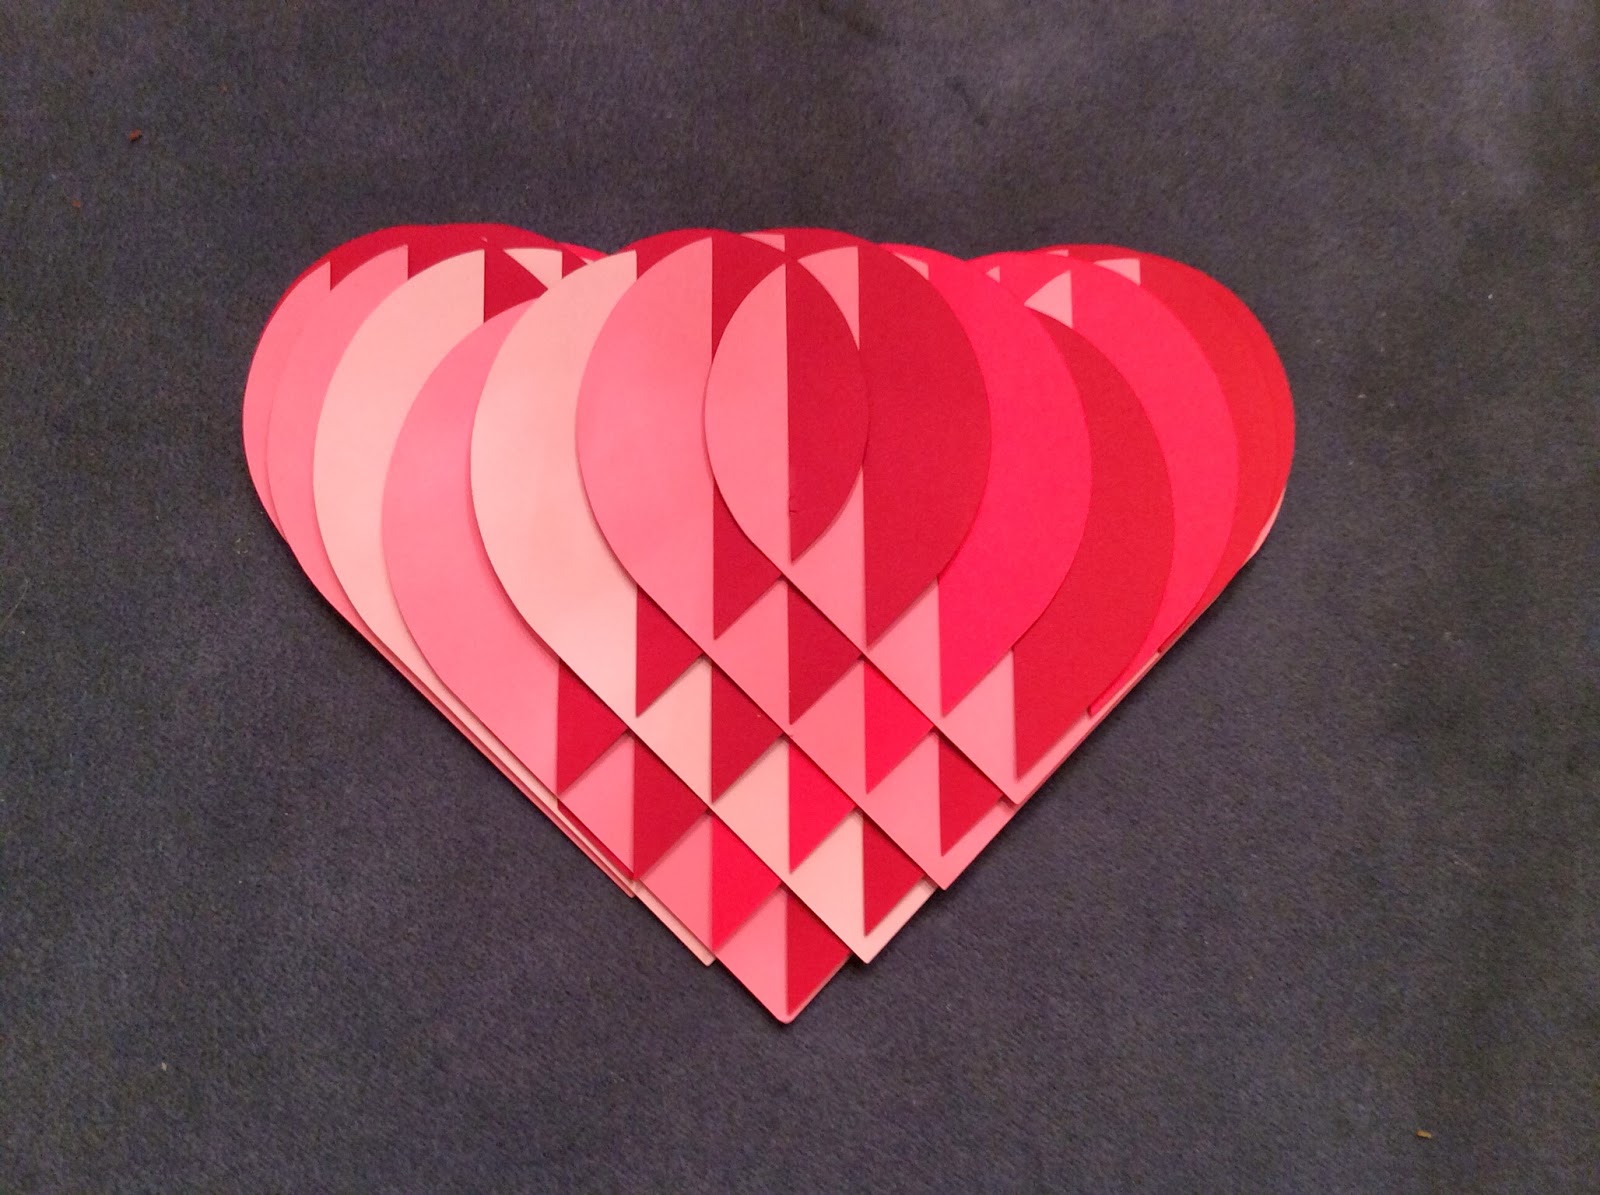
 Sliceform Heart and Base
 Loop the tab over the point.
 Loop the tab through the base as shown.  The tabs are split between the two sides.
Glue the tabs to the side and tear away the excess paper.
 
The Valentine Pop-Up looks nice even without the scalloped base.  You can stop here if you do not want to sew the design to another base.

 Knot the thread onto the scalloped base.
 Loop the thread through the base at the lowest point as shown in the picture.
 Thread it through the base.  It is now attached at one point.  Repeat for the other side.
 Thread it to the other side.
 Loop it over.
 And knot the thread on the back side of the base.
 

 Here is what it looks like lying flat.
 Fold the second base (red) in half.
 Put glue on the side that was sewn and combine both halves at the crease so that it will fold properly.
 Completed Valentine Pop-Up
Here is what the pop-up looks like when folded flat...very pretty!

Saturday, January 18, 2014

Cupid's Torus Heart for Valentine's Day

A Torus Heart Valentine Decoration

A torus heart and cupids are the epitome of Valentine's Day.  I love the way that the cupids are holding the heart.  The red torus heart is floating in the center of the structure.  The weight of the torus heart was a factor in using five layers of cardstock glued together.  I think that you might be able to obtain the same thickness by sandwiching chipboard between two layers of cardstock.  However, I have not tried this because I cut the cupids a few times and did not have to resort to chipboard.  If you do use chipboard, please leave a comment and I will update this post with your recommendation.

Here is the PDF of the torus heart valentine.
https://drive.google.com/file/d/0B7oGIyVDbRGYX2ZJUmdkcmM0RDA/view?usp=sharing&resourcekey=0-IAaJJVWG29hDxZwkA7H08w

Here is the .Studio file.  I used cardstock.
https://drive.google.com/file/d/0B7oGIyVDbRGYbGlFMHFCa1ZYZXc/view?usp=sharing&resourcekey=0-tbYbZw6a9C8yWPCl22RviA

I put a drop of glue at the top and bottom of the heart torus to keep the heart from expanding in the middle. Use the directions from the pumpkin torus to make the torus heart  http://papercraftetc.blogspot.com/2013/10/a-honeycomb-pumpkin-decoration-for-fall.html
and the directions from the previous post to make the base.
http://papercraftetc.blogspot.com/2014/01/a-paper-sliceform-heart-table-decoration.html

A View from above. 

Melvin admiring my Valentine's decoration.

The framed pictures in the photo above represent the beginning of my paper fascination. I created them over 25 years ago.

Saturday, January 11, 2014

Sliceform Heart Table Decoration


Sliceform Heart Party Decoration

It's time to have a party.  This sliceform heart decoration is so pretty, that I want to show it off. It is large enough to make a statement but not too large to overwhelm. This centerpiece could be used for a variety of parties...a birthday party, a Valentine's Day party, a shower party or even a wedding.
 
Here is the PDF of the sliceform heart.
 
Here is the .Studio file.  I used cardstock.
 
 Cut two of the same angel pieces and glue them back to back.  This is needed to give the cardstock support to hold up the sliceform heart.


 Slide the angel pieces together and place in the base but do not glue to the base until you have completely put the slices of the heart together.


Do all of the upward facing slices first in one direction...as shown in the above picture.
 
 
 And then the other direction to complete the sliceform heart.
 

Attach and glue the base as shown.  Next, glue the contrasting base to the bottom. (not shown)


Marley always has to get in the picture. As soon as I put the new placemats on the table, he came running to see what was happening.  Of course, he had to sit on the clean placemat.  He got up a few minutes later and there was a clump of cat fur stuck to the placemat.

 
I would love to see a picture of your party decoration if you make this design.  Please share a picture of it with me.  Thanks!
 

Saturday, January 4, 2014

Roses are Red, Violets are Blue, I Would Love a Heart Sliceform, How About You?


Sliceform Heart

Of course you would, if you are reading this post.  I know there are other versions of this heart  sliceform online but I wanted to make my own version with more slices and more definition. When looking at the top of the heart, you can actually see the four lobes of the heart.  Did you ever wonder why a heart is called a heart? Well here is the reason, the four lobes of a 3D heart represent the four chambers of a human heart. I also needed to make this version for my next project which is a heart snow globe.  So look for it in the upcoming weeks. 

Here is the PDF of the heart sliceform.
https://drive.google.com/file/d/0B7oGIyVDbRGYYmJWLW54X3l0czg/view?usp=sharing&resourcekey=0-KOprtUHSkoN7RPIeSVcL9Q

Here is the .Studio file of the heart sliceform.  I used cardstock.
https://drive.google.com/file/d/0B7oGIyVDbRGYSlRNWUMxdy00c1k/view?usp=sharing&resourcekey=0-oAfcPpWVDa3e-r749CKzew

You can see the four lobes of the heart.  The heart is a little skewed because it is hard to get a good picture while it is lying on its side.

Here is the sliceform heart lying flat on a surface. I love the little triangles that are formed when closed.

An animated look of the sliceform heart hanging from my chandelier.